DIY Flower Petal Ink

Yesterday was the first day of summer vacation for my daughters, and it’s already off to a promising start. My rising 2nd-grader slept in until just after 11 am, then promptly announced that she was “so, so bored.” I love boredom as a motivating force – Left to her own devices, she ended up collecting flower petals from around our garden with a plan to turn them into ink for a summer’s worth of art.

Petals for DIY Ink
Petals for DIY Ink

Since neither of us knew exactly how to make ink from flower petals, preferably in the most immediately gratifying way, we did a quick Google search and found these simple directions from GardenGuides.com that called for petals, boiling water, an overnight wait, and a few drops of rubbing alcohol.

Testing the Colors of Our DIY Flower Petal Ink

Voila, this afternoon my daughter has her flower petal ink. Painting the test squiggle of each ink was great fun – Many of the petals turned out a color very different from what she predicted she’d get, and each of the inks darkened and changed as it dried. The white clover ink, for instance, started out as almost invisible and then dried to a pale and pretty yellow, not unlike white clover petals when they catch the sunlight. Red and purple poppy petals made for a lovely red and green ink, while the rose ink that appeared to be a completely washed out disaster when it was wet on the paper dried to a pink with darker edges.

Calendula and Clover DIY Flower Petal Ink

None of these colors are as bright and saturated as store-bought pigments, but they have a soft beauty all their own. Better yet, my daughter has a personal connection to each color, and she’s set for many afternoons of painting and writing.

Want to make your own? Give it a try – It’s easy and rewarding. 

Petals and Boiling Water to Make DIY Ink photo
  1. Collect petals from your favorite flowers. More petals will give you more ink, but you can work with just a few.
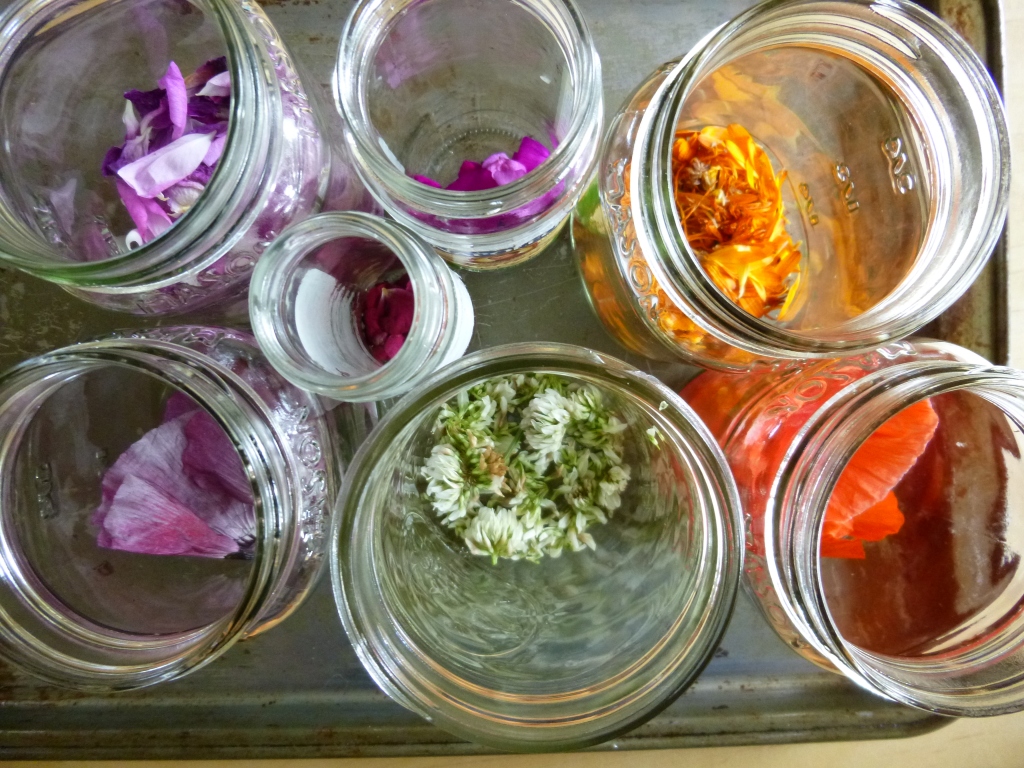
  2. Set each type of petal into its own jar.
  3. Cover petals with boiling water, just barely enough to cover the petals when they’ve been smashed down with a wooden chopstick or other tool.
  4. Set aside to brew overnight.
  5. The next day, strain each batch of petal tea through cheesecloth to separate the petals from the liquid. Pour each batch of ink back into its clean jar.

    Straining DIY Flower Petal Ink
    Straining DIY Flower Petal Ink
  6. Add a few drops of rubbing alcohol to each jar of ink and shake well.
  7. Store well covered when not in use. My daughter uses a small watercolor brush to paint with hers, but these should also work in an old-fashioned fill-it-yourself fountain pen. Or in a DIY feather quill…Maybe that will have to be our next project.

    Poppy DIY Flower Petal Ink
    Poppy DIY Flower Petal Ink

If you give this a try, please let us know how your colors turn out!


11 responses to “DIY Flower Petal Ink”

  1. Paige Kenzie Avatar

    This is so awesome! I’m trying to slowly move over to more natural methods of everything in my daily life, and this looks fun!

    1. Rebecca Rockefeller, Rock Farmer Avatar

      Thanks, Paige! My daughter’s using these to paint again as I type this – The whole process of making the inks was fun (and fast), my favorite sort of natural experiment! If you give it a try, please let me know how it goes.

  2. quarteracrelifestyle Avatar

    Reblogged this on quarteracrelifestyle and commented:
    Love this idea, the effects are beautiful and perfect to replace watercolours in some painting I think 🙂

  3. quarteracrelifestyle Avatar

    Beautiful and am going to try this, thanks so much for a wonderful idea.

    1. Rebecca Rockefeller, Rock Farmer Avatar

      Thanks! Please let us know how yours turn out – I’m guessing you have some petals to work with that we can’t grow here!

      1. quarteracrelifestyle Avatar

        I will. Sounds like a most beautiful way to keep alive the many colours of our hydrangeas and blue pansies, my favourites in the garden 🙂

  4. CJ Avatar

    Wonderful, what a very creative idea. I am convinced that it is good for children to be a little bored sometimes – that is when they come up with fantastic things to do.

    1. Rebecca Rockefeller, Rock Farmer Avatar

      I agree! This was much more innovative than anything I had to offer, and the entire family ended up involved in the process, and learning a few new things. We’ve got a long summer ahead still, with more opportunities for boredom-as-inspiration 🙂

  5. Linne Avatar

    When my sons were small, if they said they were bored, I always told them they were allowed to be bored for as long as they liked. They always found something to do quite quickly! I love what your daughter and you did with the petals. Do you know if they last after being used or does the work fade out over time?

    Now I know what to do the next time mum gets a bouquet . . . (once it starts wilting, of course . . .) A great idea and I’m re-blogging, too. ~ Linne

    1. Rebecca Rockefeller, Rock Farmer Avatar

      That’s right in line with my own boredom policies! We only just made this ink the other day, so I don’t know yet how long the art the ink is used in will hold its color. So far, so good, but that doesn’t help much, I know…Thanks for sharing the post!

  6. Linne Avatar

    Reblogged this on A Random Harvest and commented:
    Interested in DIY inks for painting? I don’t know how long the paintings retain their colour, but it would be worth trying out, I think. I plan to try this later on and I will photograph whatever I create (in case it does fade away . . .) ~ Linne

Leave a comment